How to Make Travel Videos for YouTube
Making travel videos for YouTube has become increasingly easy with the availability of small, lightweight, and powerful video capture equipment. Many devices can fit in your pocket or bag yet produce high-definition footage. There are even some great resources online to help you get started on this creative journey; below are some useful tips that will hopefully make it easier to take that first step into making travel videos for YouTube.
- Get Creative! – Let’s face it, not everyone is a creative genius, but one thing all creative geniuses have in common is the ability to be original. The best way to show off your creativity if you don’t feel like you’re artistic or imaginative at heart is to find a creative outlet. Doing something like this will allow you to be original and produce videos that will stand out from the sea of people doing the same thing.
- Showcase Something Unique – If you’re in a city or country that sees frequent tourism, there is nothing wrong with showing off these areas but try to show it from a different perspective than everyone else has. The Lonely Planet guides for various regions around the world can give you some good ideas and inspiration and even lead to some great story ideas.
- Be Realistic – You may have big dreams and aspirations when it comes to travel videos for YouTube, but don’t set yourself up for disappointment by trying to do too much all at once; especially if you’re just getting started. Try to stick with the goals you’ve set, such as simply capturing good footage and learning how to edit it well.
- Pace Yourself – If your goal is to make travel videos for YouTube, this does not mean you need to upload a new video every day or even every week; there’s nothing wrong with taking breaks for a little bit and coming back fresh and recharged. This will keep your motivation up and keep you from burning out; both of which are common pitfalls among those making videos online.
- Promote – What would Facebook be if nobody shared anything? Get friends, family, even strangers to watch your videos! Share on social media sites like Facebook, Twitter, Google+, Instagram, and others; or share on sites like Reddit and StumbleUpon. An easy way to get your videos in front of more people is to include links back to them in the description section if enabled by hosting sites like YouTube.
- Be Passionate – If you enjoy what you’re doing it will show through in your work. People are drawn to passion, so have fun with it! This should be a fun hobby for you, not another source of stress or burden.
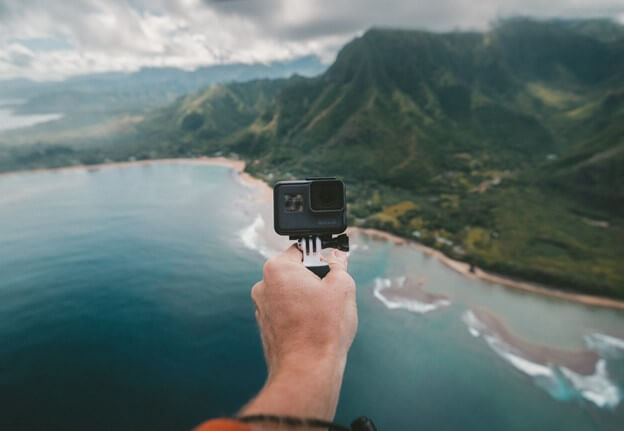
- Get Creative with Video Equipment – The best quality will always come from dedicated devices designed specifically for capturing video, but there are many small pocket-sized cams available that can do just fine when shooting travel videos for YouTube. Consider using a tripod and monopod to steady the frame (both of these can be found on Amazon) and even consider getting some accessories like lavalier or shotgun microphones.
- Get Creative with Video Editing – There are many editing options out there; while some may be free, others cost money. Consider upgrading if you want to have more control over your video’s authenticity. Also, remember to add music to your video to make it more entertaining!
- Have Fun! – Do not forget that making travel videos should still be fun, so go out there and get creative!
Things You Need Before Creating Your First Travel Video
Before starting to film your first travel video, you might need to purchase some equipment. This is not an exhaustive list, but should give you a general idea of the items you might need:
- Video Camera. This can be anything from a DSLR to a GoPro, or even your iPhone or Android phone.
- Tripod. This will help keep your camera steady while filming and is especially important if you’re using a smaller camera or phone.
- Monopod. A monopod is essentially just a one-legged tripod and can be helpful if you want more mobility when filming.
- Video editing tool. There are plenty of online tools that can make your video look like it was professionally made.
- External microphone. These are especially important if you’ll be filming in an area with a lot of background noise (like near waterfalls, for example).
- Lavalier microphone. This is useful when you need to record the sound of your voice, but don’t want to use camera audio or external microphones.
- Shotgun microphone. Shotgun microphones will pick up sounds in front of them while eliminating most background noise. If you’re filming in very quiet areas where camera audio will be sufficient, this might not be necessary; however, they can come in handy when filming outside in windy conditions or around waterfalls and other loud scenes where lavaliers won’t work well.
- Wind protection accessories/equipment. When recording outside with any sort of microphone, you’ll need to think about wind. There are many ways you can go about this; just be sure not to use any sort of object between the microphone and the subject because it will pick up audio sounds from right behind it as well!
- Lighting equipment. If filming in low-light conditions, having a good lighting kit is always helpful. LED lights can also help if you want to give your footage a unique tone or set them inside a tent at night for ambient light that won’t ruin your night vision.
Can’t wait to start creating your travel videos for YouTube? We hope these tips will help get you started on the right foot. Remember to have fun with it and let your personality shine through. Most importantly, don’t forget to enjoy your travels!


Post Comment
You must be logged in to post a comment.